Creating a Requisition
| Audience: | All users |
| Last Reviewed: | 27 January 2026 |
| Introduction: | This topic explains how create a requisition and assign order information to it. |
| Related Topics: | Copying an existing order |

To order materials or services for a vessel, either the ship or the office must raise a new requisition.
Requisitions are created by either Creating a New Requisition or by copying an existing order.

A new requisition can be raised from three different locations:
From the top left of the home page.
-
Click on the [Create Requisition] option and then either type in the vessel name or select the Vessel you are creating the requisition for from the drop down list,
From the top left of the Purchasing screen.
Click [Add], then [Requisition]. If an order has been selected in the order list, its vessel name will automatically be added to the new requisition but the vessel name can be changed if required.
From the top left of the Purchasing screen > Quick Action Links.
Click [ShipSure], then [Marine Purchasing], then [Orders]. This will open the Requisition Details Wizard where a new requisition can be added. Generating a Requisition using this method will not automatically insert a vessel name.
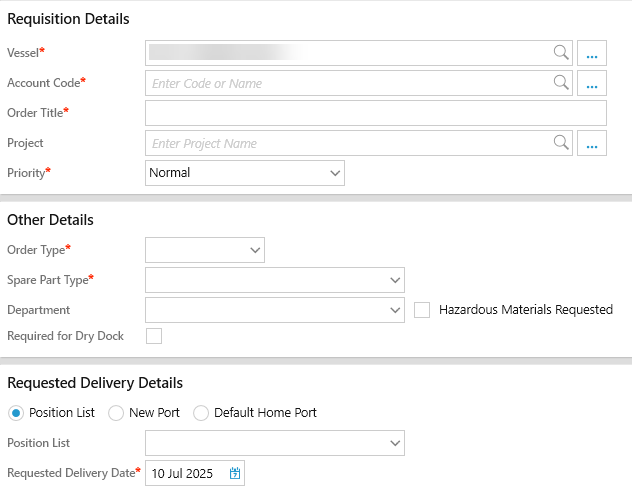
On the first page of the Create Requisition wizard, all of the general details about the requisition must be entered i.e. any fields marked with a RED*star are mandatory:
-
Enter the name / number for an Account Code, then select the account code from the drop-down list. The account code will be added to the Order Title field, this can be changed if required.
If the selected account code has an auxiliary code associated with it, this is normally only for "Insurance Claims", enter the insurance claim number into the Insurance Claim field. The Insurance Claim number will already have been created in ShipSure Accounts.
If the selected account code has a preferred supplier associated with it, the supplier will automatically appear in the suppliers listing under the Suppliers tab. Other suppliers can still be added.
-
Project - If the order is related to a specific project, type in the project name and select the project from the drop-down list.
-
Priority - select from the dropdown list.
-
Order Type - Choose whether the requisition is for:
-
Consumables
-
Spares
-
 - Regardless if "service" is selected, a component must be added on the next page of the process
To ensure that parts ordered by the vessel are fit for their purpose, the Spare Part Type must be selected. See below list.
EPM - Equivalent Parts Manufacturer
N/A - Not applicable
NOM - Non-original parts
OEM - Original Equipment Manufacturer
OPM - Original Parts Manufacturer
-
Tick the Hazardous Material box if required.
-
The [Requested Delivery Port] can be entered if required. Type the name of the port, then select its name from the drop-down list. Alternatively, click the [...] button to search for all ports within a country.
-
Both the office and vessel users are given a warning message regarding 'possible delays to order processing' if a delivery port and date has not been entered
-
The [Requested Delivery Date] must be entered.
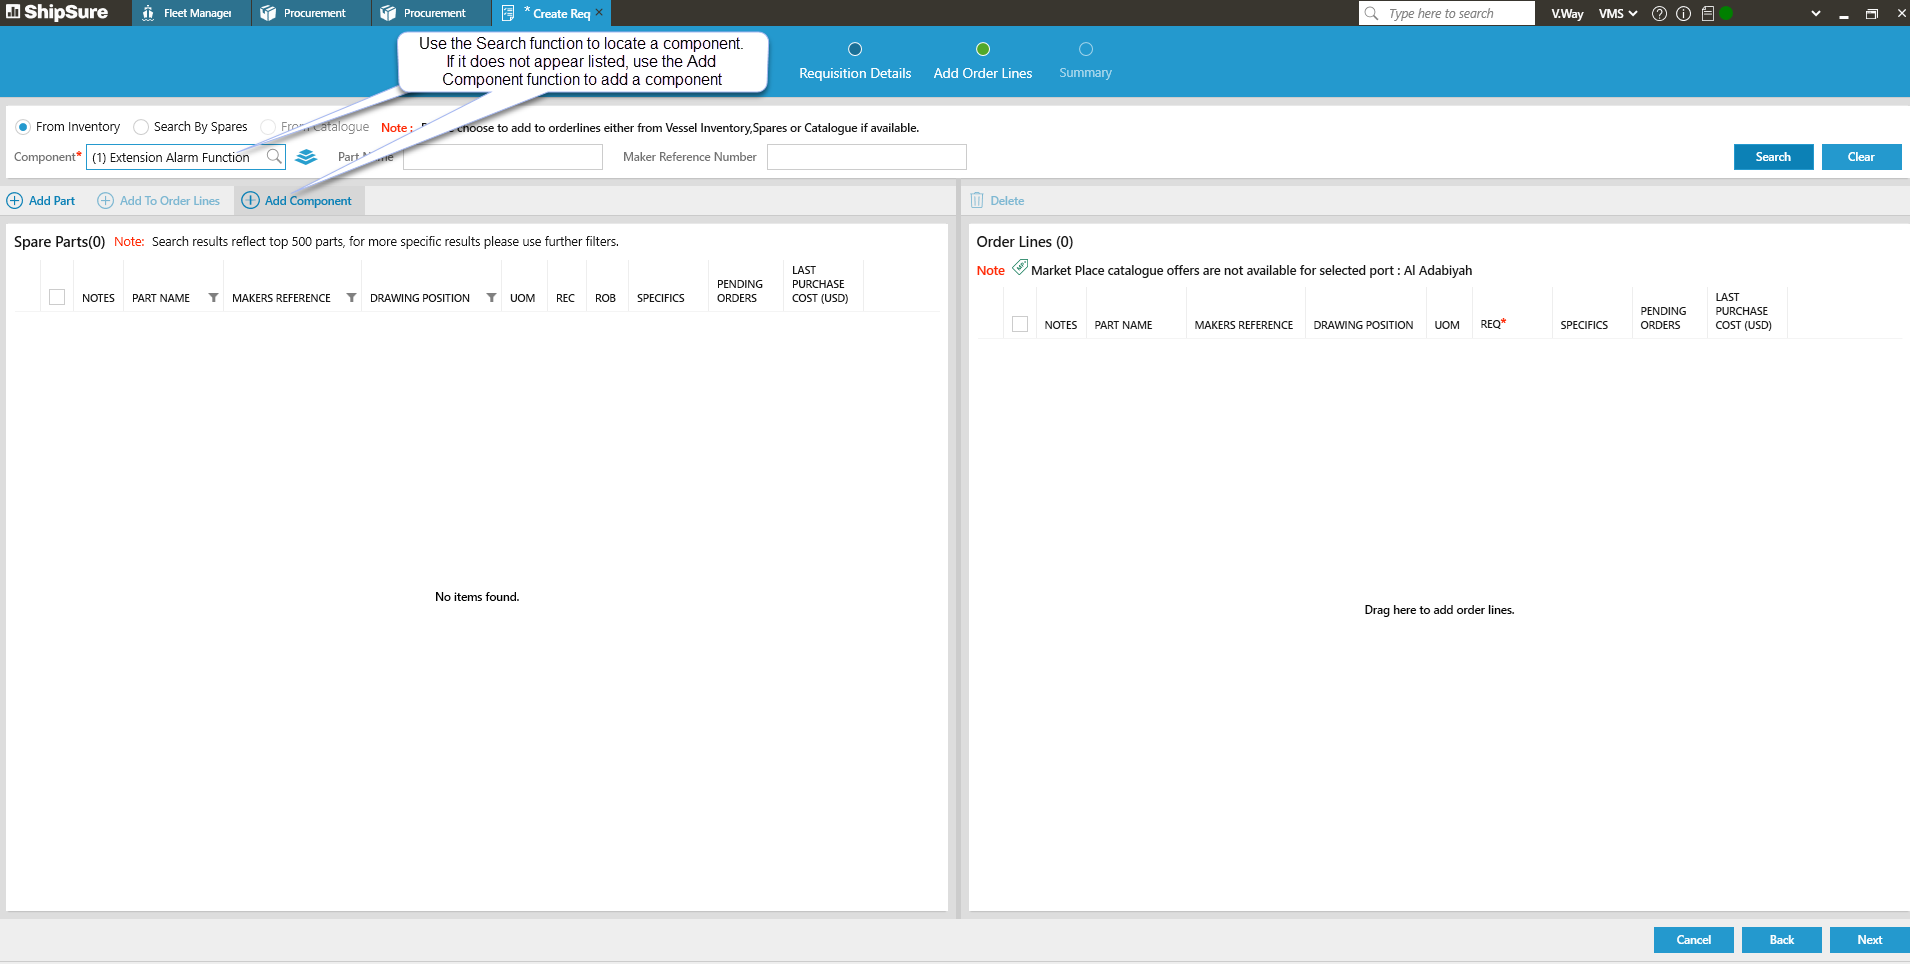
The [Next] page of the wizard allows the user to select a component.
It is compulsory that a component MUST be selected (even if ordering a service).
For Service orders it is advised to use the wild card symbol - % - before a search term to find the word "service" within the components.
In the component field box, type in the component name then select the component from the dropdown list.
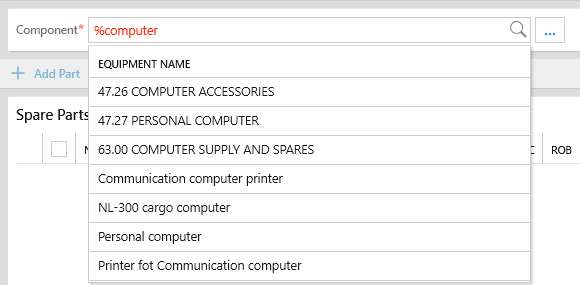
If the component is not available the user can Add a Component.
Both the office and vessel users are given a warning message regarding 'possible delays to order processing' if key information has not been entered.
Use the search function to locate a Component, but if it does not exist it can be added by clicking on the 
The Add Component button will not become live until a search for the Component has been carried out
This will open the System Area Tree for the vessel the requisition is being created for where the user can drill down into the area where the Component is to be added.
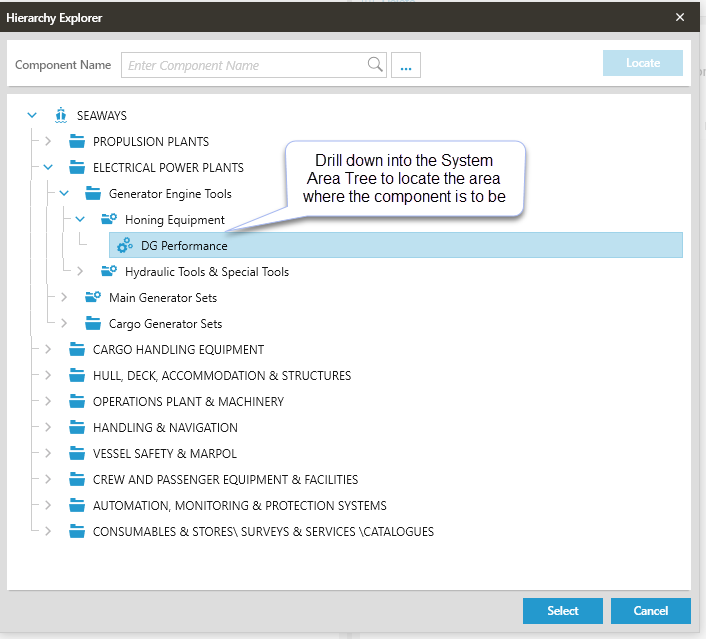
NOTE: A Component cannot be added at a top level of the System Area Tree
Things to know about the System Area Tree:
- The Component Tree drives the ships equipment
- All equipment on board is classified and grouped in the tree
- The Tree assists with the Purchasing of Spares, Consumables and Services and contains Catalogues
- The System Area Tree is common across all modules that have an association with equipment
Click on the  button when the area is located.
The Add Component Tab will open allowing the user the enter the new component details.
Fields that are indicated with a RED* are mandatory and must contain data.
General Tab
Enter all of the required details into the General tab remembering that the fields indicated with a RED* are mandatory and must contain data.
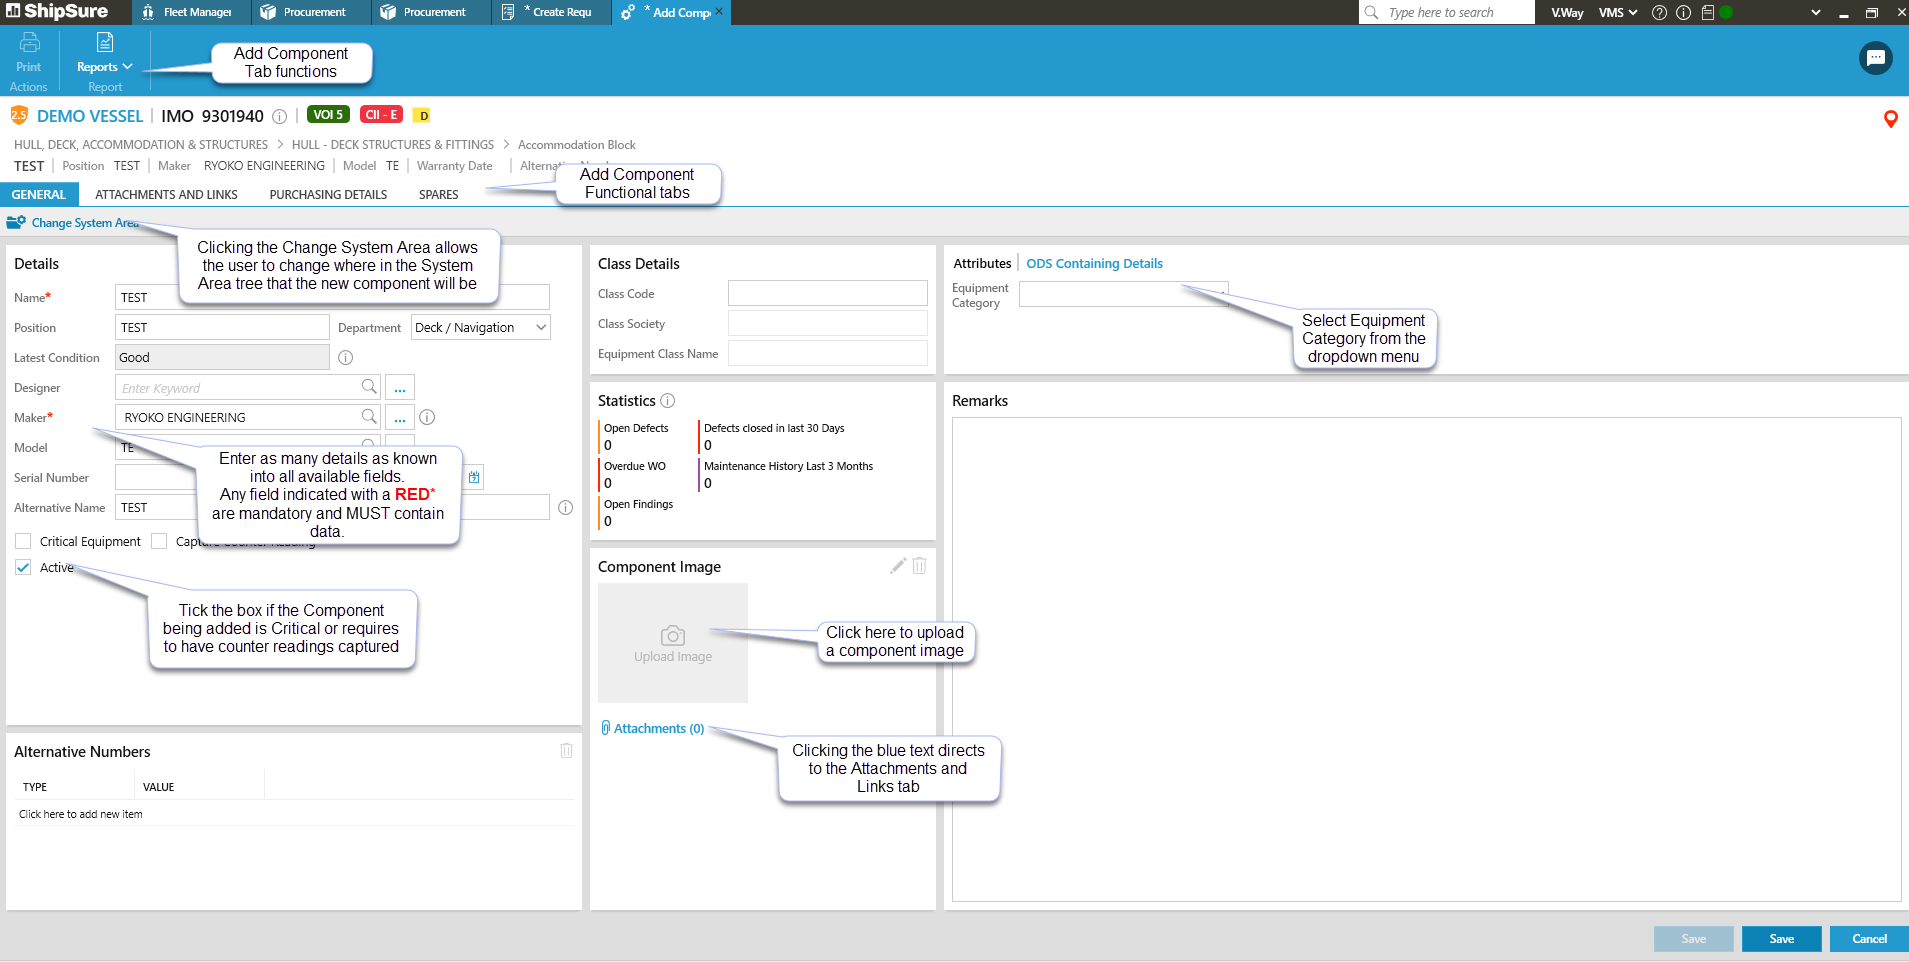
If the wrong system area has been selected it can be changed by clicking on the  icon and reselecting the correct system area from the tree.
By Ticking the box on for the Critical Equipment and the Capture Counter Readings will associate these to the new component.
Documents or Pictures can be attached if required.
Purchasing Details Tab
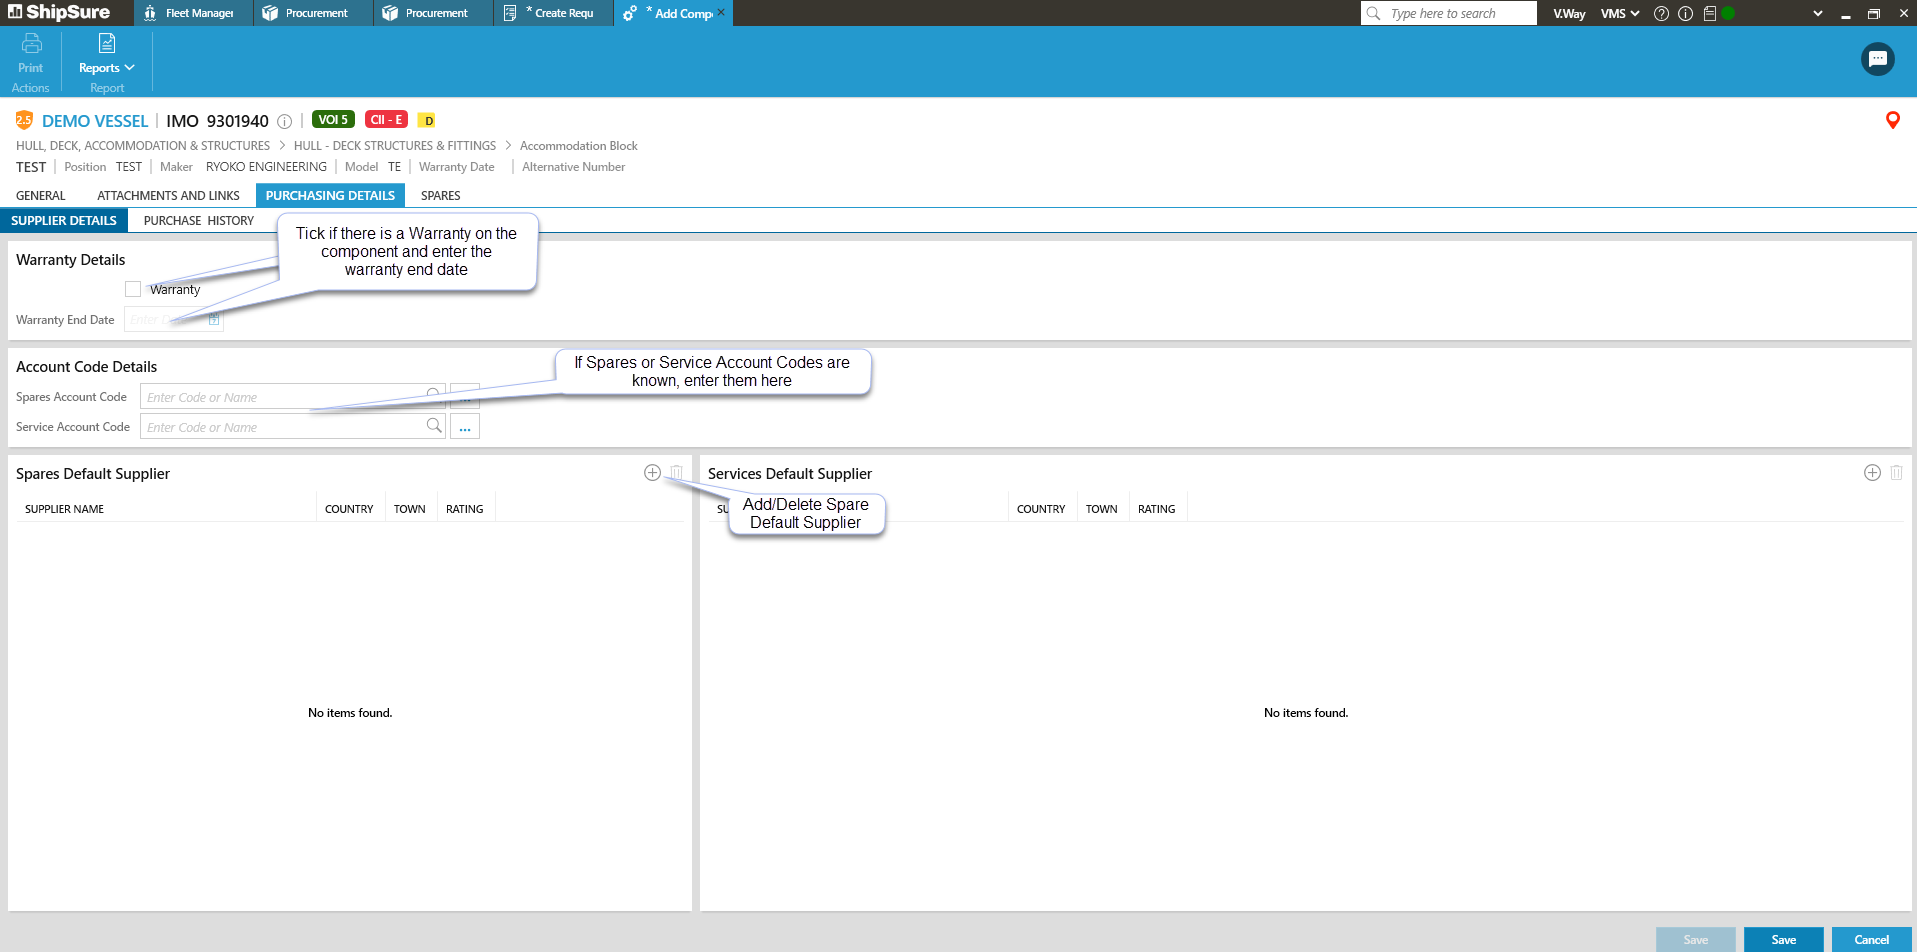
If the component being added is under Warranty, tick the box on and enter the End data.
If account codes or suppliers for spares and services are known, enter the details.
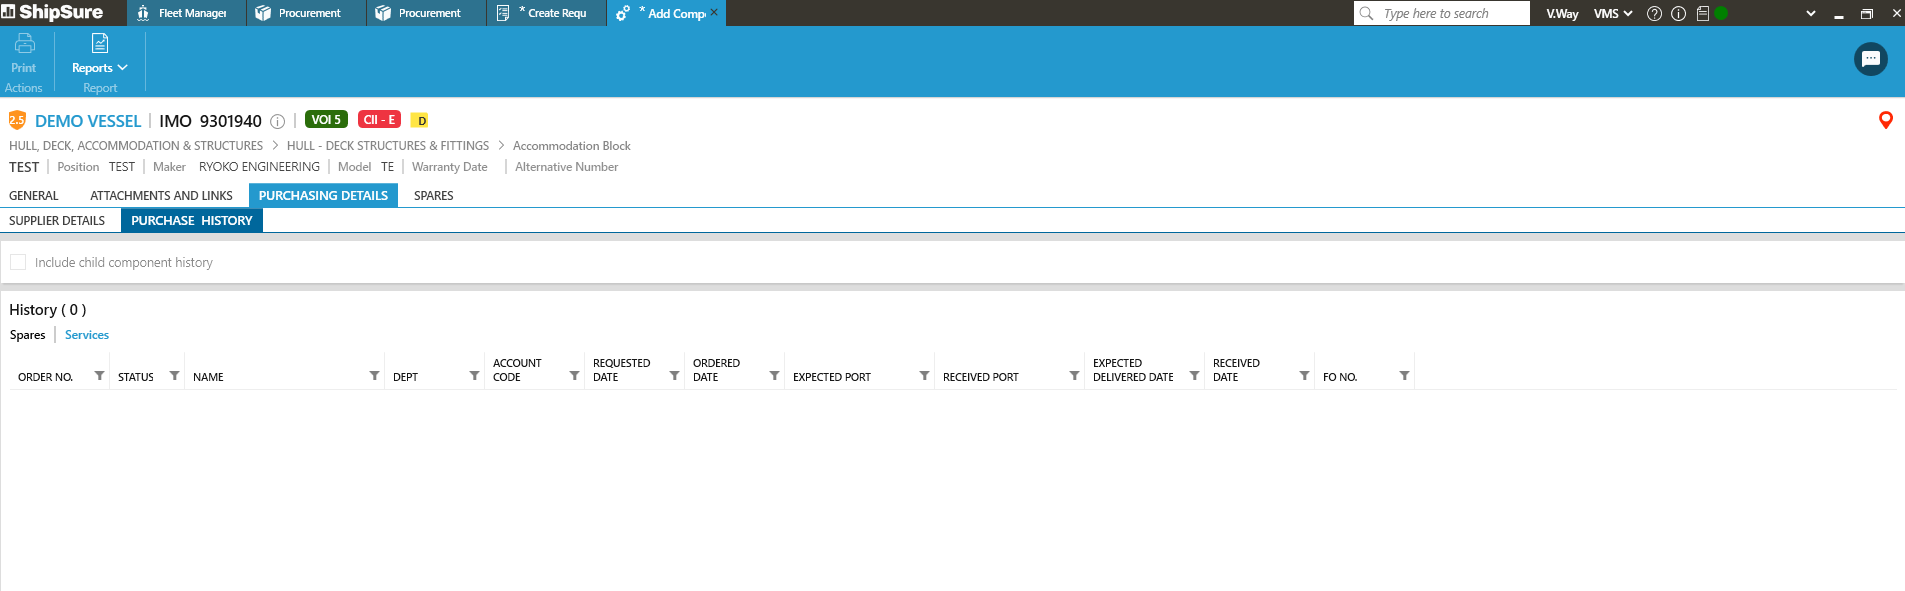
Click on the Purchase History tab to view historical details:
Spares Tab
Add Spares
Click on the ![]() icon to add spares to the component.
icon to add spares to the component.
Use the Search function to find and list the spares that can be added to the component.
When the component is highlighted the details can be viewed by clicking on the show / hide icon.
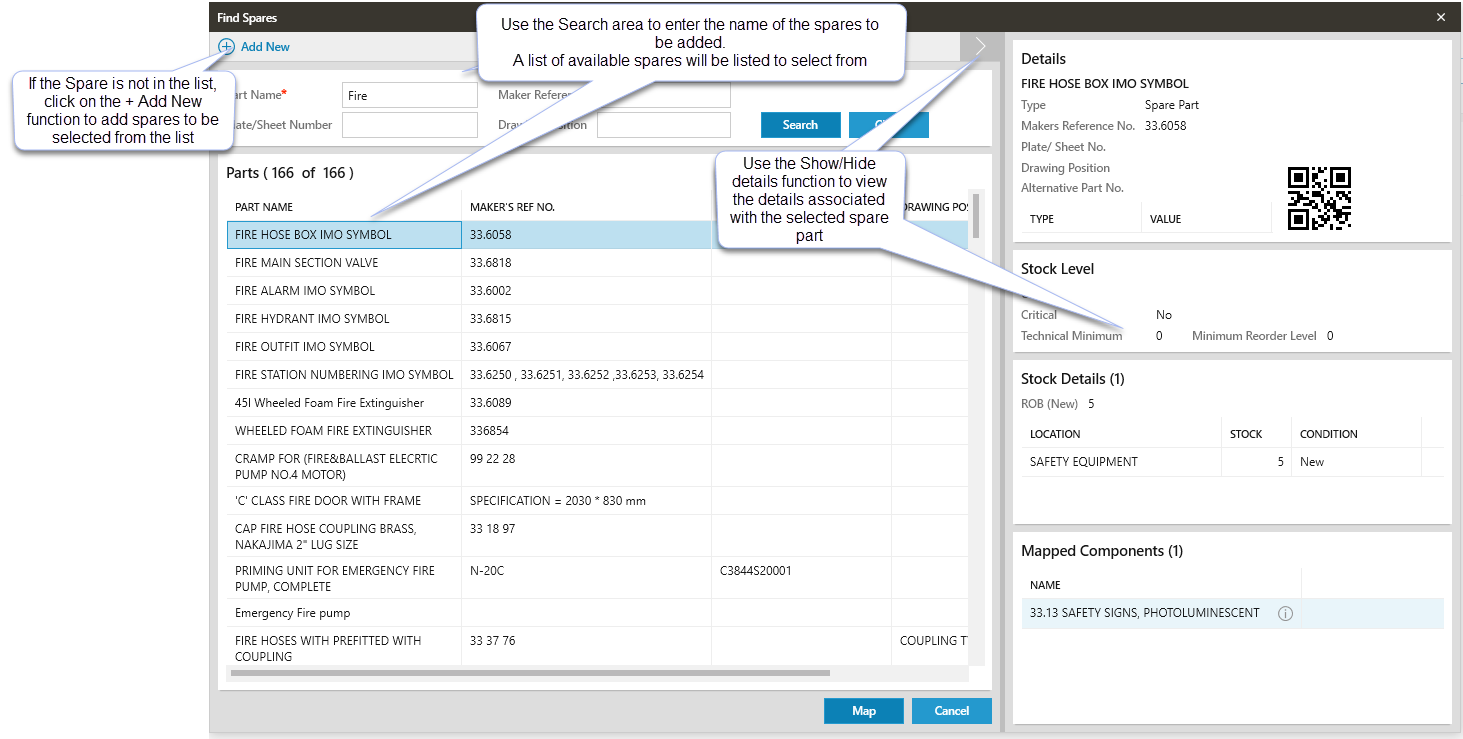
When the selection of the Spare Part is complete click on the  button
Map Spare
Click on the  icon to open the Map Spare window.
Use the Search function to locate the spare to be mapped to the Component.
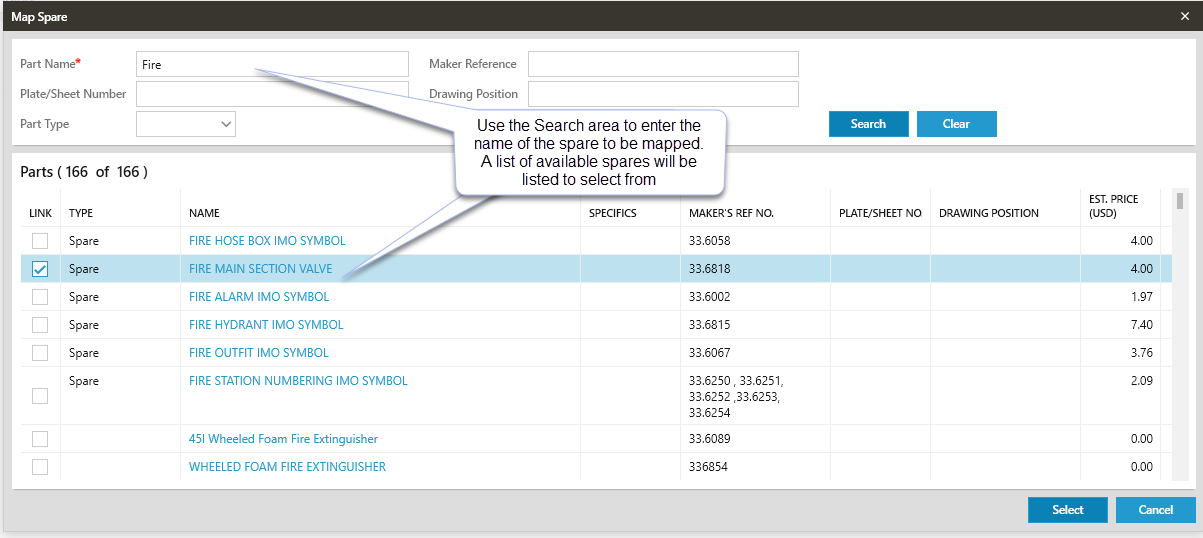
Highlight the spare and then click on the button
Unmap Spare
Highlight the spare to be unmapped from the Component then click on the  icon.
icon.
The system will request confirmation of the un-mapping of the Spare, select Yes and the Spare part will be removed from the list.
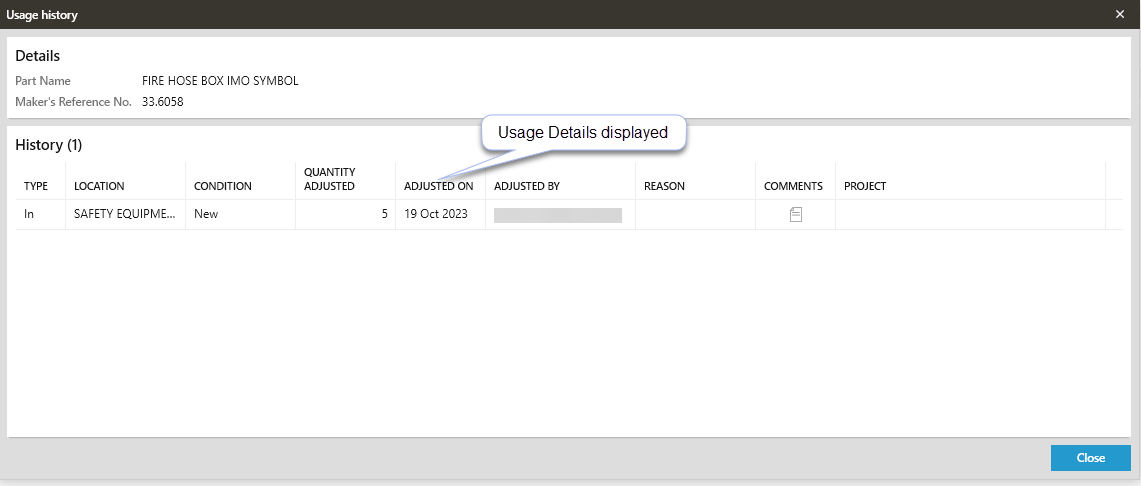
Usage History
To view the usage history of a part, highlight the spare part the click on the  icon.
icon.
The Usage History grid will open to display any previous usage for the selected part.
When all of the information has been entered click on the  button.
After selecting or adding the component a list of spare parts will be listed.
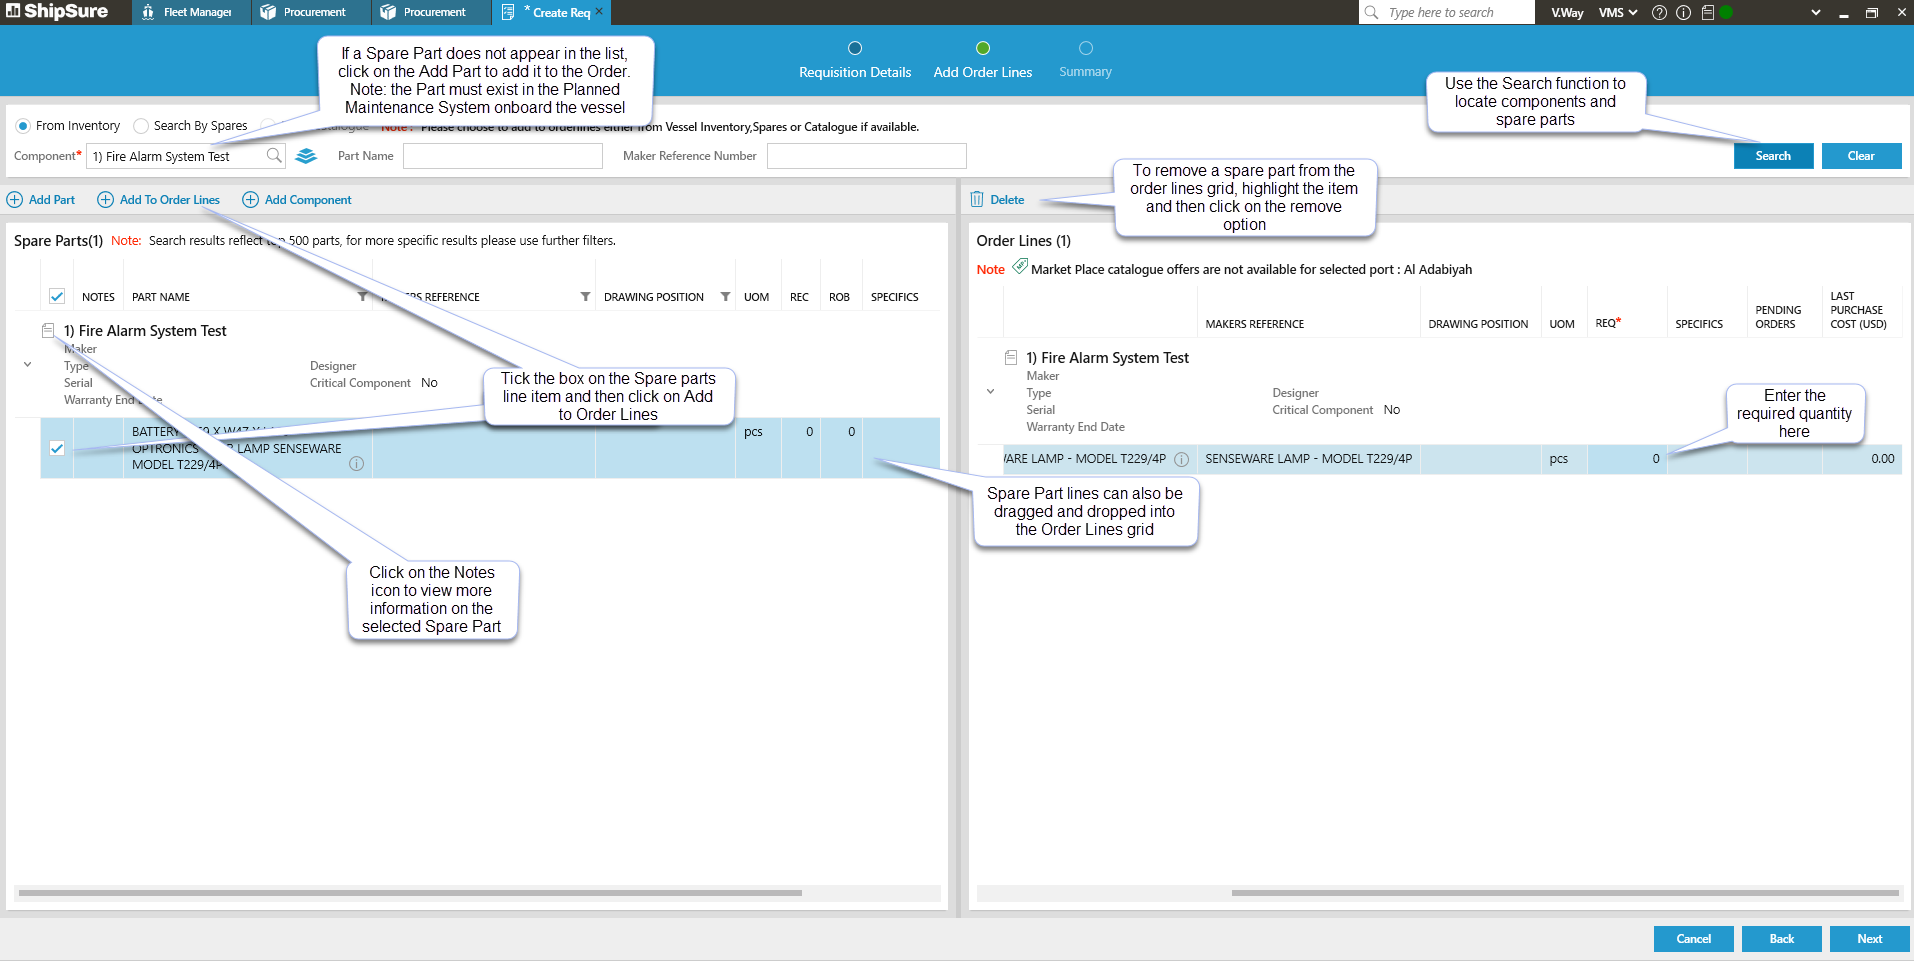
-
Tick the box beside each spare part to be ordered.
-
Click [Add to Order Lines] or Drag and Drop the selected spare parts to the order lines grid.
Adding a Part
To order a spare part NOT listed against the component, click the [Add Part] option.

- Type the spare part name or Makers reference number into the appropriate field.
- Click on Search.
- If the spare part is available it will now be listed.
- Select the spare part required.
- Click on the Add button.
- The selected part will now appear listed in the Order Lines grid.
- If an order line is no longer required, select it and click on the [Remove] option.
- A quantity must be added to all order lines under the REQ* column before continuing.
When complete, click on the [Next] button to view the requisition summary and add any notes.
Adding a New part
If a part does not exist after searching for it, click on the + Add New option
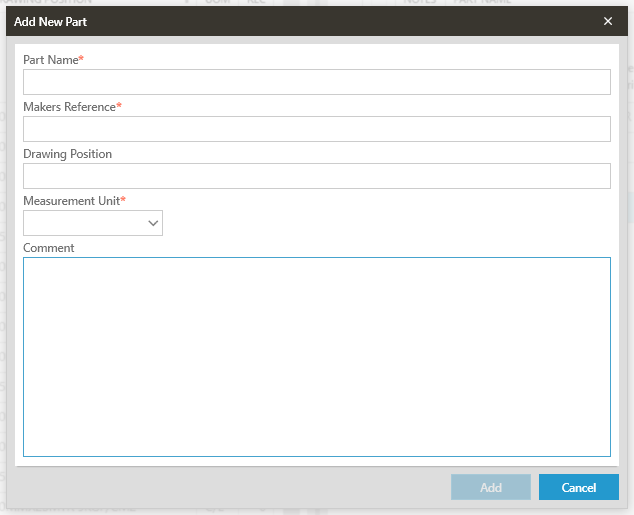
Enter all of the required fields (all indicated by a *)
Click on the Add button.
The selected part will now appear listed in the Order Lines grid.
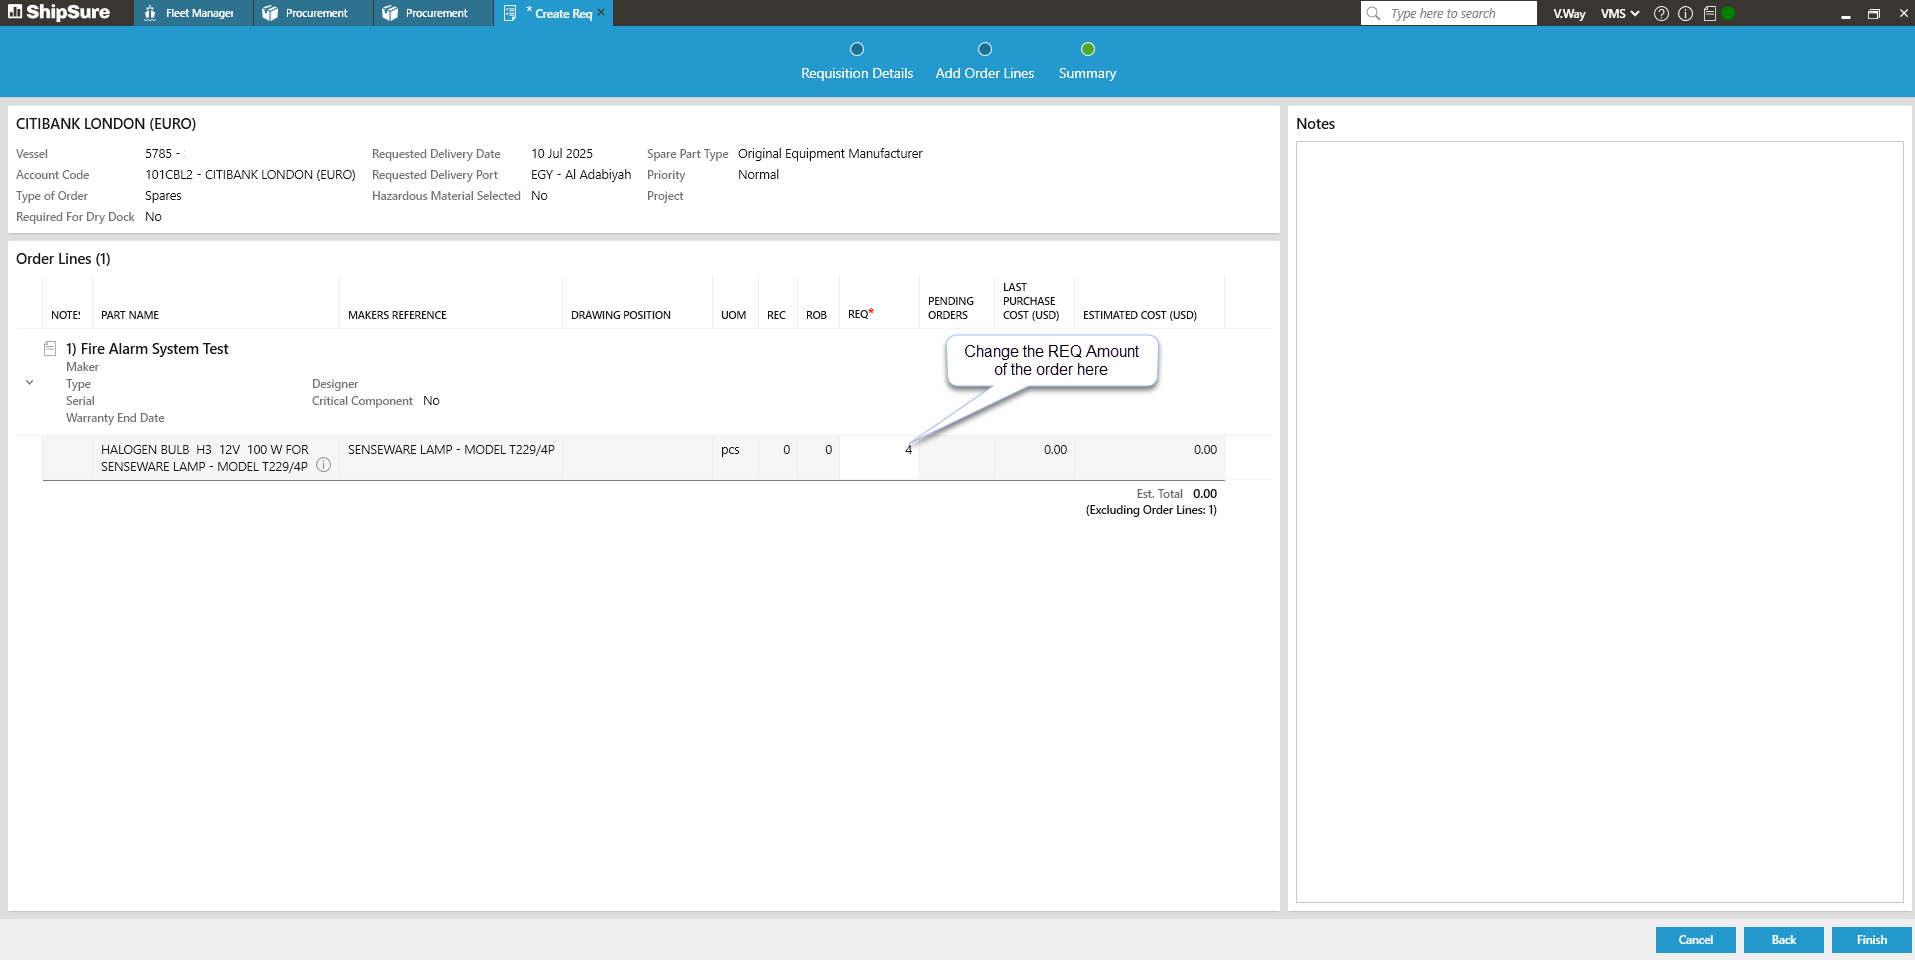
- The Requisition Summary screen provides an overview of all the information that has been added.
- Changes can be made to the order quantities or click the [Back] button to make any other changes.
- Add any notes that will assist the supplier / technical team, then click [Finish].
- The automatically generated requisition number will be displayed and the details view will appear.
What next?
If the Requisition does not need to be split or merged, it can be reviewed before it is converted to an enquiry.